I have tried just about every method of composting you can imagine. As you all know, you can never have enough compost, so I am always looking for ways to make better compost quicker. I have always been frustrated with how slow and labor intensive the outdoor methods are, and find I am getting a product that often times has a lot of incompletely composted material. In the end, what I have found to be the best way to quickly make the best compost is to use earthworms. The compost from earthworms is called Vermicompost, and is also sometimes known as Worm Castings. Whatever you call it, it is basically worm poop which the worms create as they are eating table scraps or other organic matter. To the organic gardener, vermicompost is pure black gold for the garden.
So, I believe the best way to compost is to use earthworms. Now the question becomes what is the best way to start your earthworm operation. There are a lot of videos out there on how to grow worms in home brew systems. The advantage of this is it offers the lowest cost approach as you utilize scrap material you probably have laying around like 5 gallon buckets. For me though, when I am learning something new, I really want to achieve early success, and want to go with a proven, turnkey system. Once I develop success and expertise, and want to expand the operation, I can always go back and then consider the homebrew approaches. But, to guarantee early success, I typically start with a commercial turnkey system.

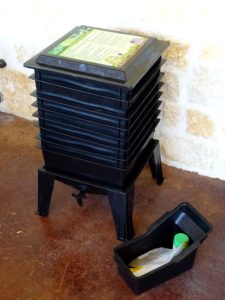
I did a lot of research on growing worms, and in the end decided to go with the Nature’s Footprint Worm Factory 360. Knowing that I wanted to make a lot of compost quickly, I also ordered the extra set of trays, found HERE. This allowed me get my compost operation going even quicker. What I liked about this system is that it appeared to have all the bugs worked out, and it included EVERYTHING you needed to get started, including the initial worm bedding and bedding amendments. (The system I ordered did not include the worms, and I ordered them separately from Amazon HERE)
In choosing the Worm Factory 360, I have not been disappointed. My worms got off to a strong start, and my first tray of compost was ready in about a month. The system works as advertised, and all the details have been worked out, so that it is about as close to fool proof as you can get.
Setting your system up is a breeze. When you unbox it, it is obvious how to put it together. There is a bottom stand, a series of trays and a top. To set it up, you put a couple sheets of newspapers in the bottom tray. These newspapers discourage the worms from crawling down into the base unit. You only do the bottom newspapers on the first tray. On the next trays you want the worms to crawl up into the tray, so you don’t put the newspaper barrier.

You then break off about 1/2 of the brick of coir that is provided with the worm factory. Slowly add water until the coir is fully expanded, but do not saturate it. When you grab a handful and squeeze it should be soft, moist and spongy, but you should not be squeezing water out. If you are squeezing water out, you have too much moisture. Not a big deal, just add a little more coir if this happens. In the end, the coir should be fully moist, fully expanded and not saturated with water.
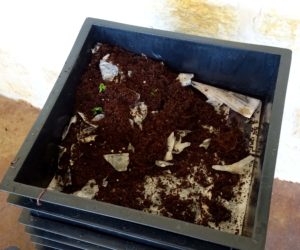
Add the coir to the bottom tray on top of the newspaper. Then add a handful of shredded newspaper. This mixture of coir and shredded newspaper is the bedding for the worms. It is a place they will be comfortable, and will recognize it as their new home.
There are a couple more components to add before putting the worms in. First, realize that worms are like chickens . . . they have no teeth. They will need some small rocks, or grit, to eat, in order to chew their food. Luckily Nature’s footprint has included some pumice in the Worm Factory kit. Add a handful of the pumice to the tray so the worms will have some grit to munch on. You will want to get more pumice, as the kit has just enough for the first few trays. Always try to buy local, but my big box stores do not have pumice. The best deal I have found on it is at amazon. The deal I found is HERE. Note that is a BIG bag of pumice and should last you years.

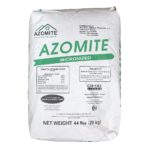
The next amendment that needs to be added to the worm bedding is some sort of mineral dust. The Worm Factory 360 includes a small bottle of rock dust, which will get you started. Add a tablespoon or two to the bedding when you start each tray. Again, I want to find a deal on the rock dust for future trays, and I like buying in bulk to same money. Try to find Azomite locally, and I suggest getting a 44 pound bag, as it is very useful in the garden, and not just in your worm bin. If you can not find it locally, the best deal I have found is HERE.
Now you are almost ready to add the worms. What I like to do before adding the worms, is to spray some quality Compost Tea on the bedding. One of the keys to organic gardening is to have a soil teaming with micro organisms. I like to jump start this process by spraying the bedding with Boggie Brew Compost Tea. Boogie Brew is teaming with beneficial micro organisms, and by spraying the bed before adding the worms, you get the process started. In addition, I use Boogie Brew all over the garden, and in the greenhouse. I have found that it greatly improves the performance of my hydroponic vegetables when used as a foliar spray. You can get the Boogie Brew mix HERE. This six pounds of mix will make a HUGE amount of boogie brew, and the bag lasts a long time.
Now you are ready to add the worms. I suggest adding at least 1000 worms to get your system kick started quickly. I have had good luck with both Red Wigglers and African Night Crawlers. You can usually find local suppliers of worms, but if you can not, I have found THESE to work well.
OK, now that you have your system set up, and your worms added, now comes the maintenance phase. You will want to feed the worms every day, or every few days. It is not hard, but you do need to watch and not over feed or underfeed. You want to start out slowly, as they seem to not eat much at first, as they get acclimated to their new home. Add just a little bit every day. Maybe a lettuce leaf, or few slices of cucumber. It is important to not over feed them, especially at first. You want them to eat the food, you do not want the food to sit and rot. If you put too much food, and it rots, then you risk attracting fruit flies, or gnats, neither of which is a good thing. So, watch the amount of food being eaten, and add more as they are able to process more. When they get acclimated, and get going, you can add a small bowl of food every day or every few days.
A couple of very important things. Earthworms are happy in a relatively small temperature range. Here in West Texas, it is too hot in the summer and too cold in the winter for the worms to thrive outdoors. Here at my house, even the garage would be to hot in the summer. So, for best results, I have found you need a place indoors for the worms. They seem to really like temperatures between 50 and 80 degrees F. I have put mine on the sun porch, which is fully enclosed. The good news is that if you are careful to not overfeed them, there is no odor at all coming from the worms. In fact, if you open the bins, it really has a very pleasant, rich, “earthy” smell.
Also, pay attention to what they like to eat and not like to eat. I have found that mine will eat almost any vegetable type kitchen scrap. I have found that they do not eat cabbage, unless there is absolutely nothing else to eat. Also, you do not want to add meat, as that could introduce pathogens into your compost. I have also found that they do not like citrus.

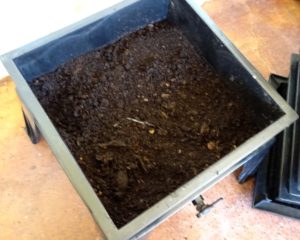
OK, so maintain proper temperature and keep feeding them. As you feed them, you will eventually get to the point that your first tray is almost full. At this point, add a second tray, following the same procedure you did above on the first tray. This time, though, do not put the sheet of newspaper in the bottom of the tray. You want the worms to crawl up into the upper tray, so do not block them with the newspaper. Once you add the next tray, stop feeding the bottom tray and start feeding the new tray. Feed the new tray slowly, as it will take time for the worms to move up to the new level. They will spend some time finishing up the processing of the lower level, and all the worms will not move up until everything has been eaten in the lower tray. Every few days, you can peak into the lower tray, and one day you will find all the worms have abandoned this level, and that is your indication that you can remove the tray and use that beautiful vermicompost you have just created.
On other note on using the Worm Factory. I have free range, grass fed dorper sheep. They produce a LOT of very nice organic sheep poop, and I want to compost that to use in the garden. When I just add sheep poop to a tray with vegetable scraps, they do not want to eat the poop. Hence, to solve this problem, I have two systems. One system I have African Nightcrawlers, and I feed that system only sheep poop. Since they have no choice, they eat the poop, and eventually get used to it and really go after it. The other system has Red Wigglers, and that system I feed with kitchen scraps and vegetable scraps from the greenhouse. I did not have as much luck adding poop and food to the same system.
I hope you have found this tutorial useful, and feel free to comment or ask questions below. Compost On!
