As we look towards an uncertain future, it is critical that we understand money. We need to understand the fundamental characteristics of Real Money, and we need to understand the difference between Real and Fake money. Gaining insight in the characteristics of real money will enable us to effectively position ourselves for the future.
I have been running a 3.5 KW Wind turbine for the last 8 years. I am located on a hill in an ideal location for wind energy. In fact, about two miles away there is an enormous commercial wind farm. So, if wind turbines for home or homestead use would work for anyone, it would work for me. Unfortunately, i must report that wind energy is not a viable option for home use. This unit produces almost no energy. if the wind is over 30 MPH it shuts down to prevent damage. If the wind is less than 30 MPH energy production decreases by the Cube of the decrease in wind speed. Hence, there is an extremely small range of wind speeds that this will produce meaningful amounts of electricity. The video goes through all the numbers in more detail, but bottom line is it would take over 150 years for this unit to pay for itself.
Unfortunately, there are still companies building and selling home wind turbines. When asked about the reported low performance of the systems that people hear, typically the sales person will say something like, “Yea, those ones in your area now were installed by someone who did not know what they were doing. They ran wires that were too small, and no power is getting from the turbine to your house. Our systems are installed by people who know what they are doing, so you will get great power from them”. Hate to tell you but the wires from my turbine to my home are properly sized. The issue is Home Wind Turbines do not produce a meaningful amount of power, and in my mind, are a waste of money. I get a 10 X ROI on my investment in solar panels. I installed a solar 5 KW plant and this wind turbine at the same time 8 years ago. I am getting 10X better return on my investment over 8 years in my solar plant compared to the wind turbine.
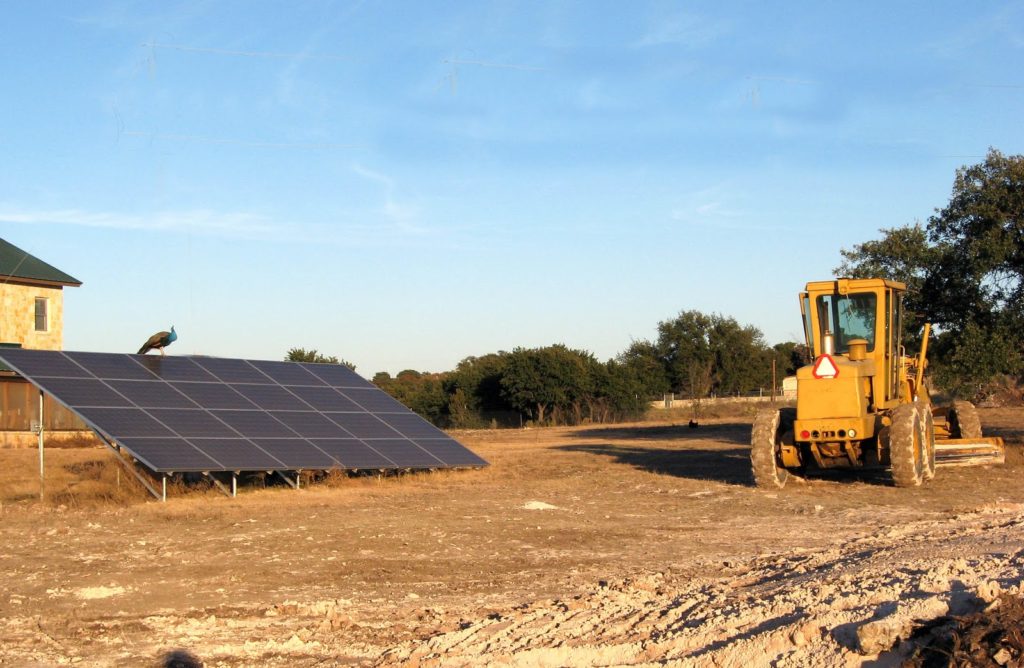
Bottom line . . . if you want to become more energy independent on your homestead, go with solar.
I installed my Grid Tied solar system in 2009, and have been monitoring its energy production on a daily basis. In the video below, I present a detailed analysis of its cost, and return on investment (ROI). Watch the video for complete details, but bottom line is my only regret is that I did not put in twice the capacity back in 2009. Be sure to watch the whole video, as in the last few minutes I outline some key factors you must consider before installing solar.
If you are going to raise chickens, sooner or later you are going to have to deal with the issue of predators. If you are not willing to deal with this issue, you should not try to raise chickens. What we have found that works best is to have a layered approach, where we have layer upon layer upon layer of protection for our birds. With this layered approach, we rarely loose a chicken to predators. When we do lose a chicken, it is usually because we have grown lazy, and not followed the procedures outlined below. I hope you find these techniques helpful, and hope they encourage you to do your best to protect your flock. Do not be discouraged if you can not do everything we outline below. Do your best to do as much as you can of each technique, and realize that any protection is better than no protection, even if you can not implement as much as we have below.
The first step in protecting your flock is to secure your perimeter. That is, your property should have a good fence. Never purchase more property than what you can afford to fence. Our homestead is 10 acres, and I found that fencing the property was expensive. Fencing was half again what I had paid for the property.
A good fence is not just an important step in protecting your birds, it is also critical to almost all aspects of prepping and homesteading. if you plan on raising a garden or an orchard, you will want to keep deer off your property. A few deer can devastate a garden and kill an orchard in a single night. During certain times of the year, deer begin to have their antlers itch, and they then go and scrape them on trees. This quickly rubs the bark off, and kills the trees. Several deer can wipe out an orchard in a single night scraping their antlers on the trees. A good perimeter fence should be designed to keep deer out and to keep predators out. In designing your fence, you should think about both two legged and four legged predators. The two legged variety will be the topic of a future article. Today, we will just look at the four legged variety, also known as varmints.
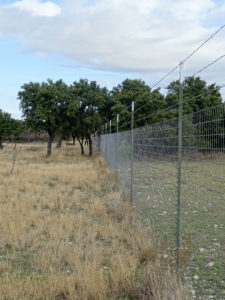
An 8 foot fence with barbed wire will keep deer and most varmints out.
It is almost impossible to create an impenetrable outer perimeter to varmints, so in putting up a fence, you should look at it as your first line of defense, not your only line of defense. The goal of the perimeter fence is to just make it easier for a predator to go somewhere else. Since we wanted to keep deer and varmints out, we decided to build an 8 foot deer fence with barbed wire at the top. We chose “no-climb” fencing which has tightly spaced (about 2 inch) wire mesh. Larger mesh is transparent to varmints, as they can walk right through it. The smaller wire mesh creates a barrier that varmints will not be able to walk through. The tight wire mesh spacing, and the barbed wire strands on top also make it uninviting to two legged predators. Again, it is not intended to be impenetrable, but just sends a message that it might be easier to rob someone else’s house than ours.
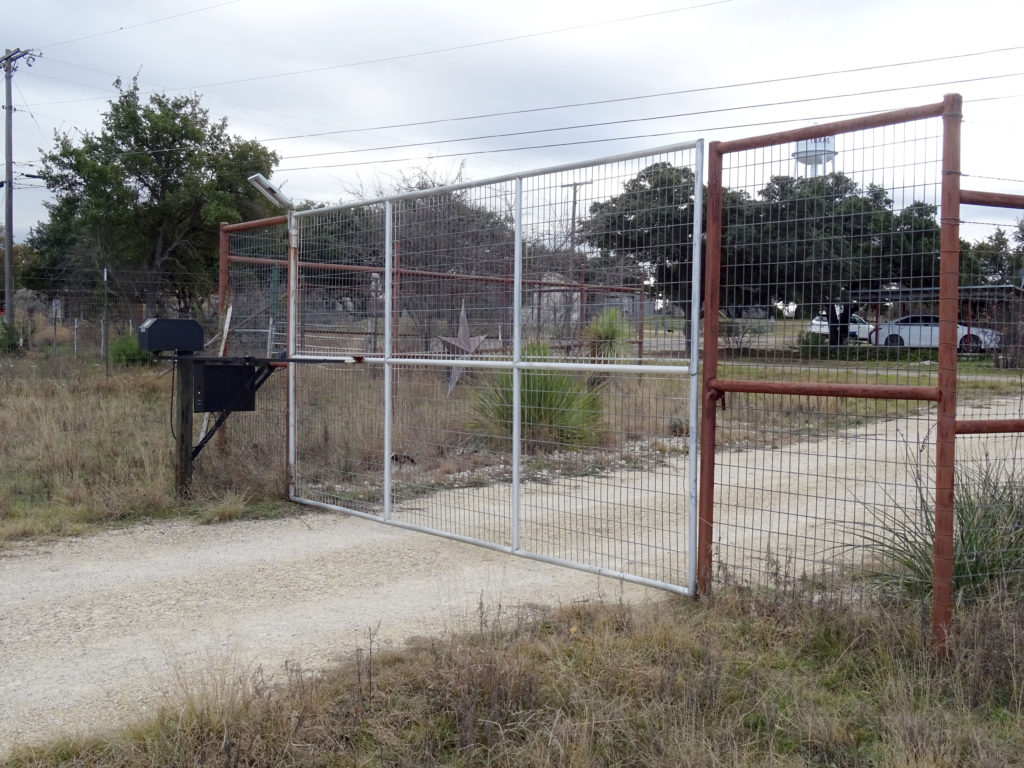
As best you can, design your property gates without gaps that would allow varmints in
In creating an outer perimeter to keep varmints out, you must pay careful attention to the property gate. Make sure you do not create an easy opening for varmints to gain access to your property. The gate material should not have any large holes, and the spacing between the gate, ground, and fence should be small. The picture above shows our property gate. Notice that there are no gaps large enough for a varmint to enter.
Again, remember that I am describing a layered approach to protecting your chickens. Do not become discouraged if you can not create a perimeter as secure as the one I show above. Do the best you can with the resources you have.
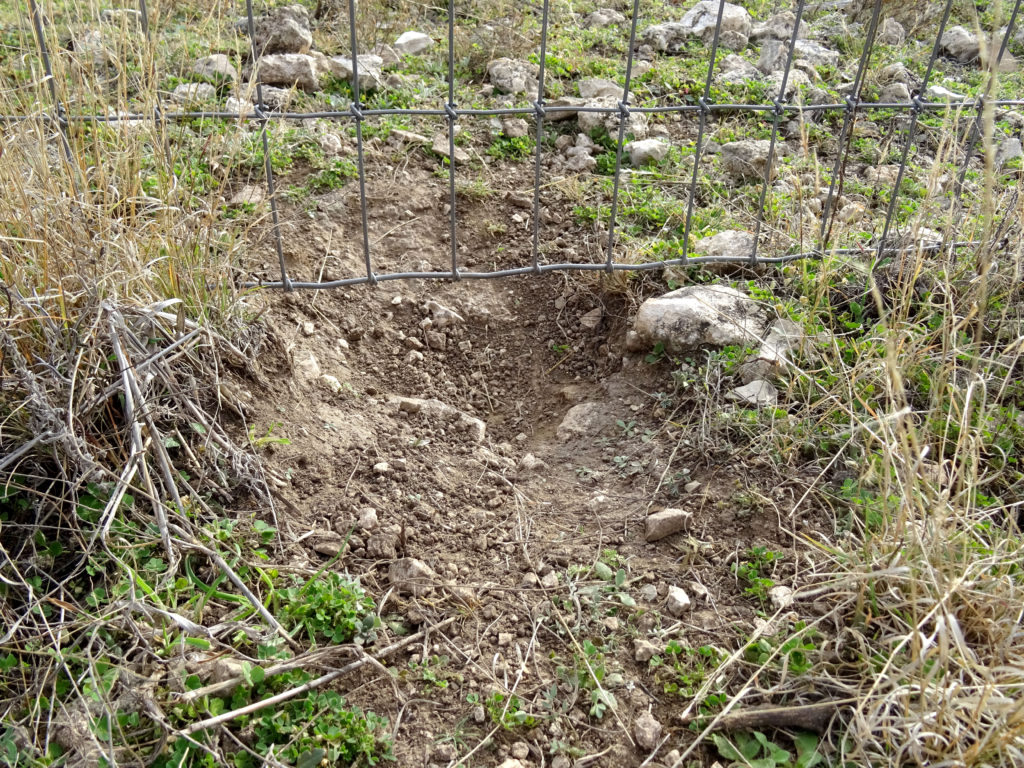
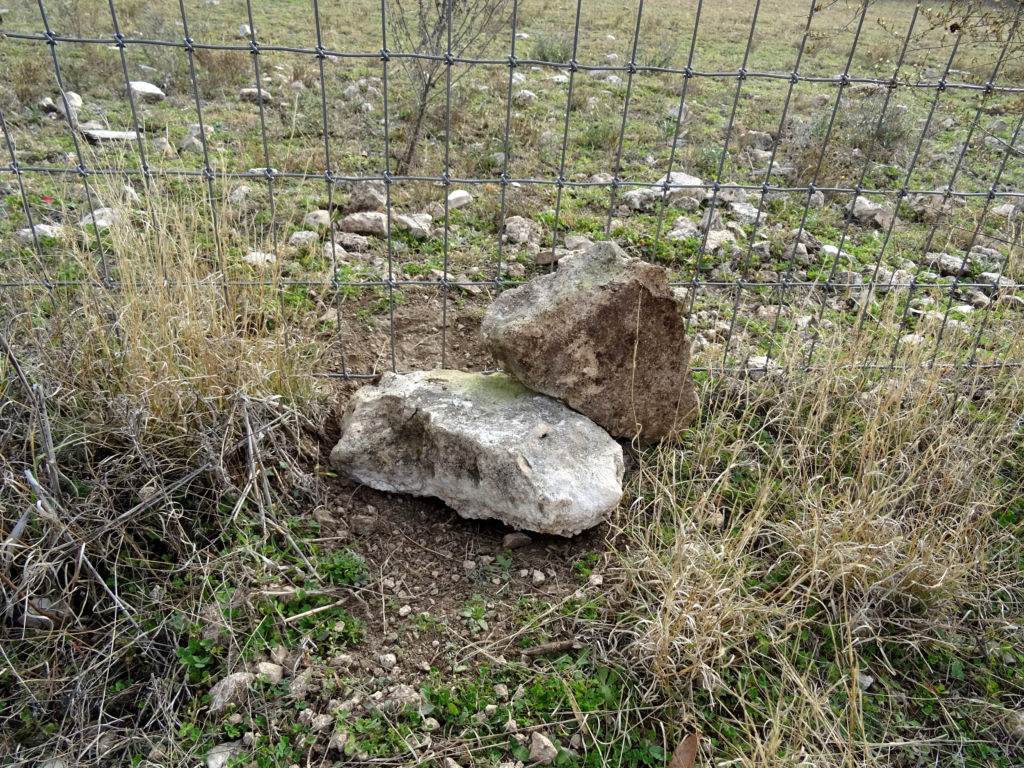
So the first step in protecting your chickens is to secure your perimeter with a good fence. The next layer of protection is to patrol your perimeter, and to look for signs of predators entering your property. Even with a secure fence, predators will tunnel under your fence. When you find signs of predators coming under your fence, plug the trails and tunnels with rocks. Use big rocks, and sharp jagged rocks if possible. Make your property uninviting for predators.
Patrolling my perimeter today, I found a number of places varmints are coming under the fence, and I plugged up these holes with large rocks.
You Must Watch for Places Varmints Are Going Under Your Fence
When plugging areas predators are coming under your fence, use big rocks, lots of rocks and jagged rocks if you have them. Make it an uninviting site for predators.
Plug Holes Under Your Fence With Large Rocks
So the first line of defense is to secure your perimeter with a good fence, and then to patrol the perimeter and plug any places that animals are coming under the fence. The next layer of protection is to clean and clear your property to remover habitat for predators. Predators love thickets, bushes, rock piles and such. As best you can keep your property clean and clear. You want habitat for grazing animals, for chicken, for gardens and orchards, not a wild bramble for varmints to hide in. When I purchased my property, it was covered with cactus and sticker bushes. Over time I have cleared it where now I have native trees and grasslands. It was a lot of work, but that is what homesteading is all about . . . constantly improving the property.
Over several years we transformed out homestead from a cactus and sticker patch to nice grassland for grazing
Varmints are reclusive by nature and big open grasslands are not an attractive home for them. You can see in the picture above, the property is not very inviting to those looking for brambles and thickets to hide in.
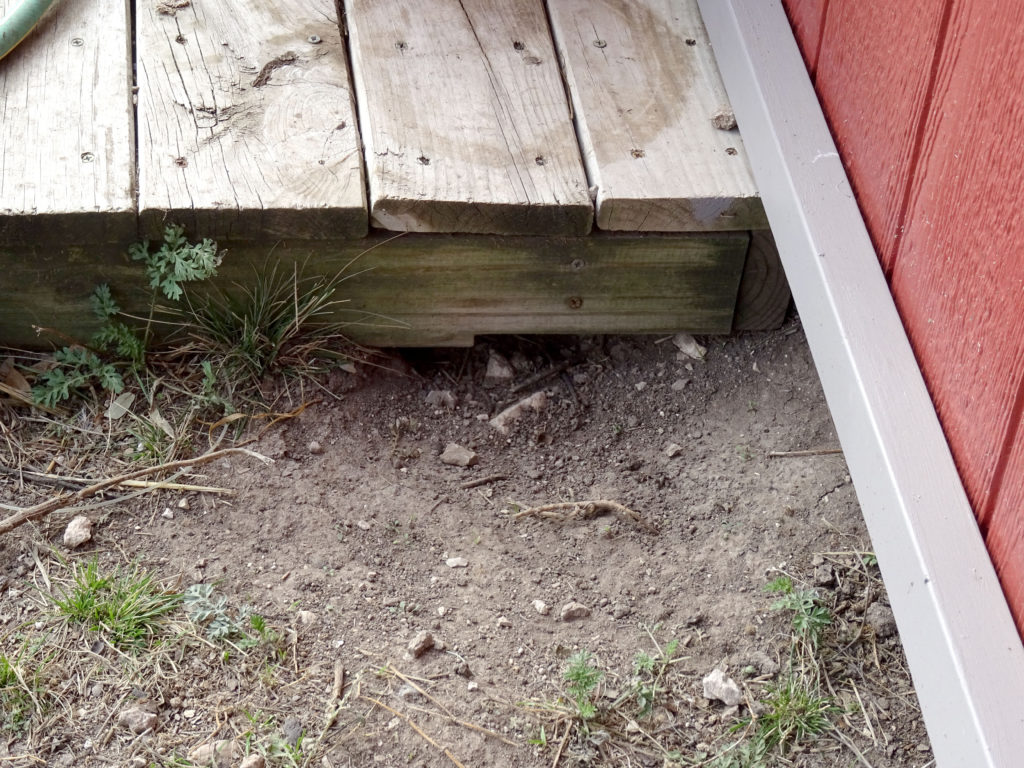
In addition to removing thickets and rock piles, you should also look for areas that would be inviting for varmints to burrow in and spend the winter. Barns are old storage sheds are very inviting places for predators.
Careful Examination Reveals a Predator has Burrowed Under this Porch and is Living Under the Porch
In the picture above you can see an animal has dug under the porch on a small storage building on my property. He probably intends to spend the winter there. This building is close to my chicken coops, and If I do not address this he doubtless will start snagging chickens out of the barnyard.
You must be diligent to keep your eyes open for any area that predators might be burrowing in on your property for winter.
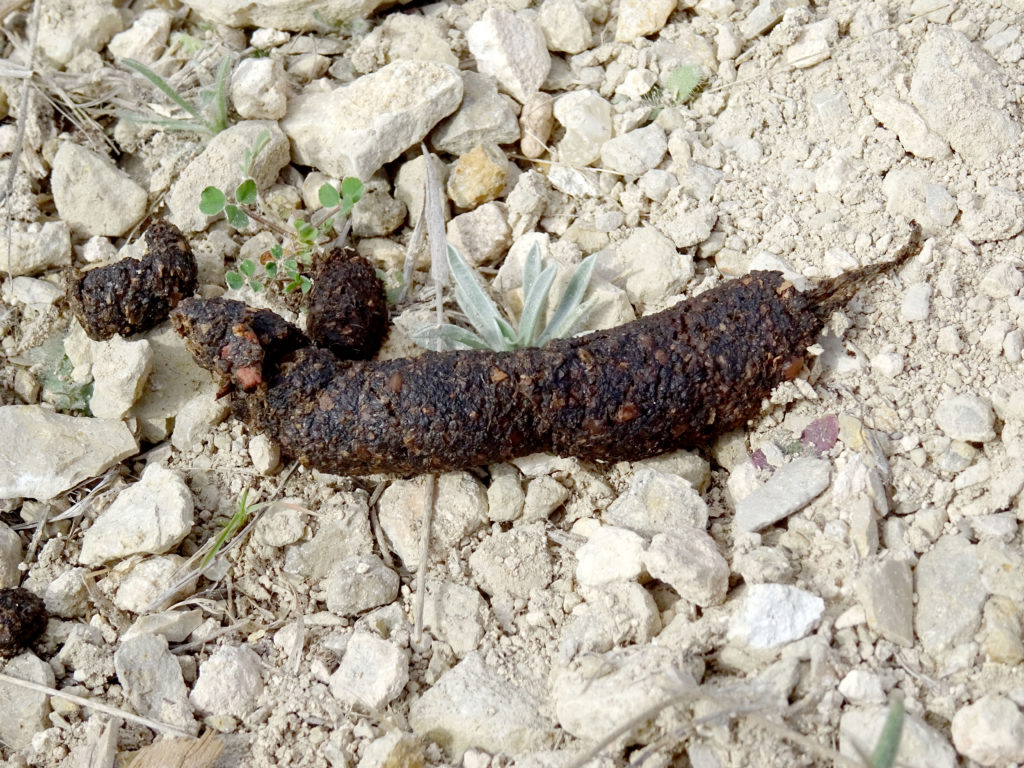
Besides looking for areas that varmints are burrowing in on your property, you must also constantly be looking for other signs that unwanted guests are taking up residency on your property. One of the clearest signs is varmint “scat”, more commonly called poop.
Predators will usually use their poop to mark their territory, so they often poop in very conspicuous places, like in the middle of the road on top of a rock. When you see the first sign of predator poop, you must immediately take action to eliminate the predator, or he will begin to take your chickens. It is fairly easy to identify varmint poop. You know what dog poop looks like and you know what cat poop looks like. Well, varmint poop is different than that. It typically is much less uniform and shows indications that the animal is a scavenger. Lots of seeds, and other irregularities.
Skunk Poop is grainy and irregular, showing signs of scavenging
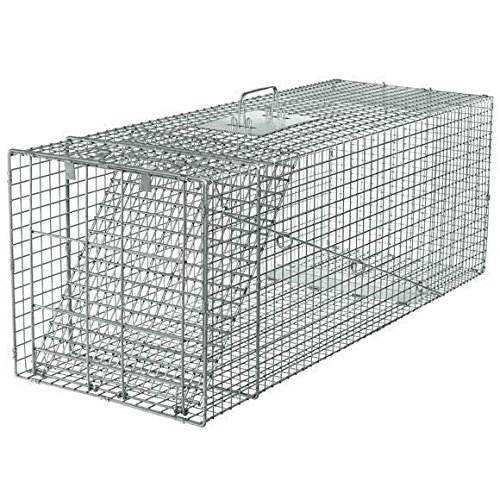
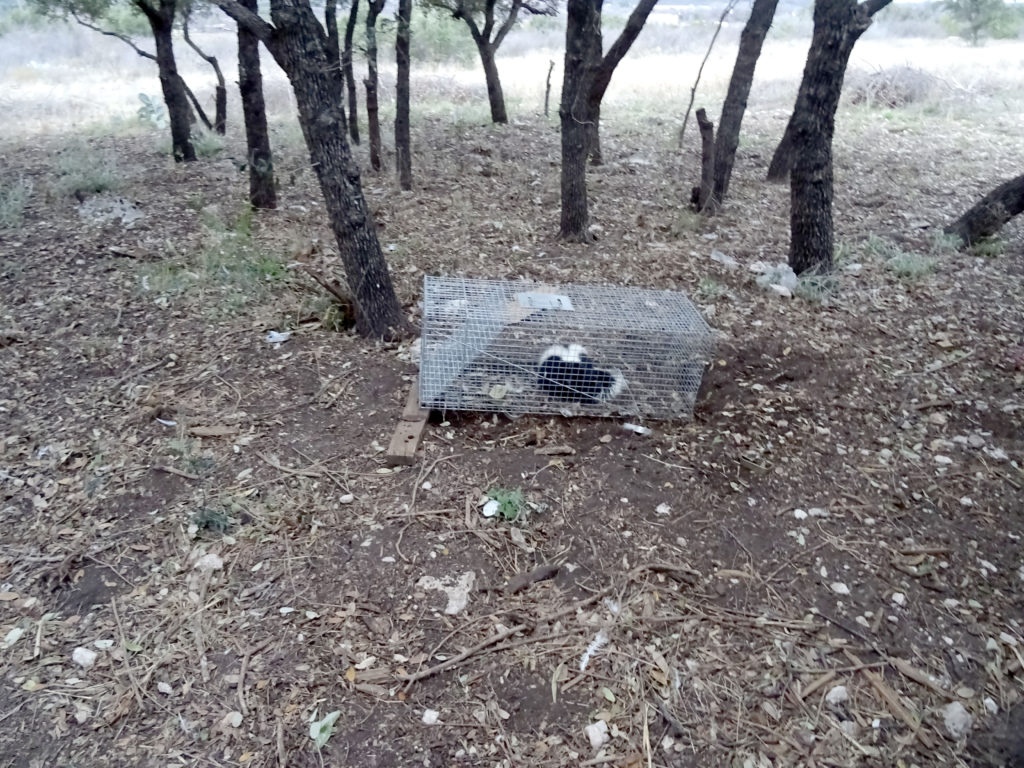
At the first sign of varmint poop, you must take immediate action to eliminate the varmint or you are going to lose your chickens. I found this poop several days ago on our property and recognized it as skunk poop. I put out my large live trap and baited it with sardines. I like the following live trap as it is large enough for any varmint, it is secure and is easy to use and effective. I recommend the Havahart 1081 Live Trap which can be ordered HERE.
Havahart 1081 Live Trap
Before setting the live trap, be sure to think things completely through. First, is it legal in your area to trap the animal that you are after. Next, what will you do with the animal once you catch it. Is there a remote place that you can legally release it? Is there an animal control officer that you can take the animal to? Can you legally and safely kill the animal yourself when you catch it?
Skunk Caught in Havahart Live trap
Similar to skunk poop, Raccoon poop is very distinctive and hard to miss.
Raccoon Poop has a distinctive red color
if you find raccoon poop you must take immediate action to protect your flock. After finding the raccoon poop above, I caught the predator using the Coon Cuff trap available HERE. If you purchase the coon cuff, I suggest you also get the setting tool. The trap is hard to set without the tool. I baited the coon cuff with marshmallows, which raccoons seem to find irresistible.
I prefer using the live trap over the coon cuff. However, the raccoons often travel and live as families, and once one becomes trapped in the live trap, the other ones can become fearful of it. Hence, we sometimes need multiple tools in our arsenal to deal with the predator problem.
For me I view my primary responsibility is to protect my flock. I am not out looking for trouble and make my property as uninviting to predators as possible. But if one comes onto my property my main job is to protect the chickens. Hence, since it is safe and legal for me to kill predators in my area, when I capture a predator in the live trap, I kill it as humanely as I can. For me, this means shooting it with a small 22 pistol.
The live trap will work for most predators except the fox. I have found fox to be much too cunning and perceptive to get caught in a trap. In fact, even though I have trapped professional, I have never been able to trap a fox. For fox, I use a call, lure the fox in with a call, and then shoot it. This is not something I recommend for the novice. If you are dealing with a fox see if you can call in a professional, or an old sage in your area adept at dealing with fox. Also make sure you pursue elimination of the fox in a way that is legal and safe in your area. For me, a fox call, spotlight and 22 rifle have been the preferred method of dealing with fox.
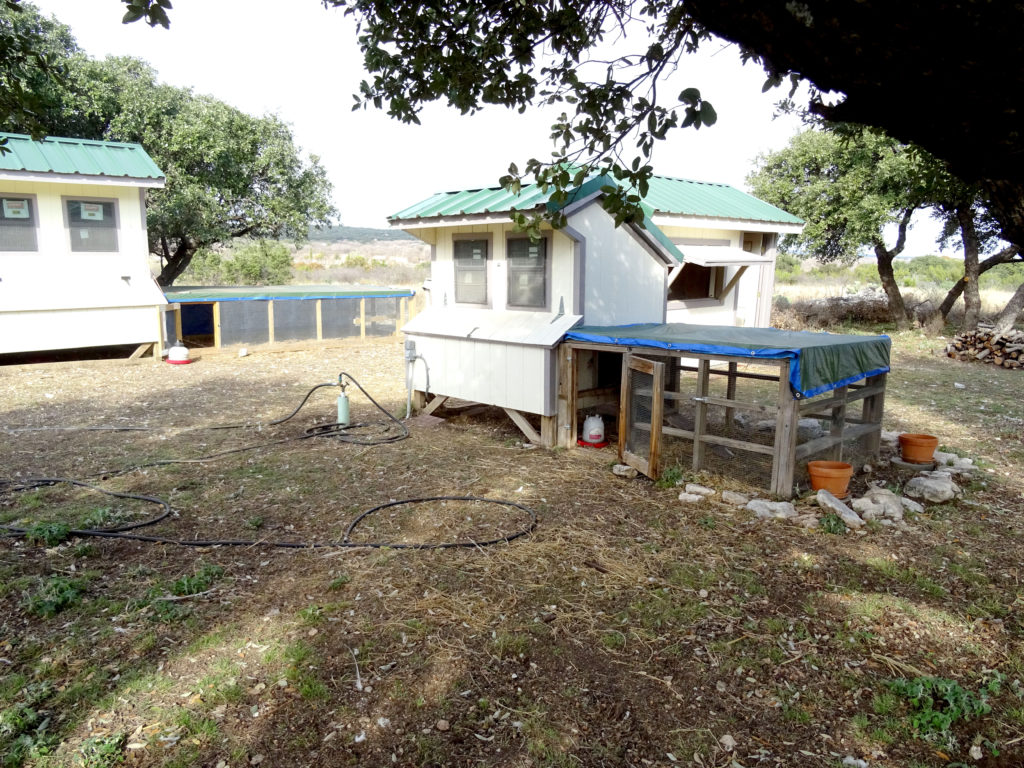
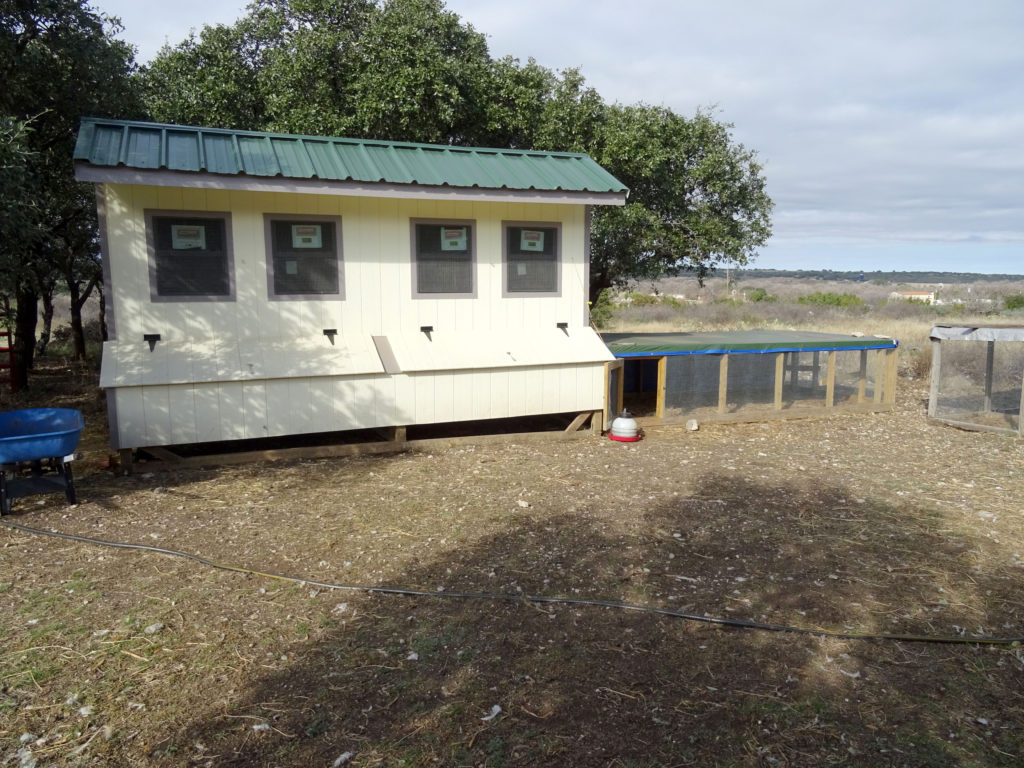
Amish Style Chicken CoopOur New Large Chicken Coop
The final level of protection for your chickens is the chicken coop. You need to make your coop and chicken run impenetrable to varmints. Remember that raccoons have thumbs so they can unlatch just about anything you can latch. Raccoons are very smart, and very adept at opening things. In addition, raccoons can crawl through very small gaps. So, you must ensure that your coop is completely secure, and that latches are strong enough that the raccoon can not open them. I use latches with a carabiner to secure the doors on the coop. I have found that raccoons so far have not been able to figure out the carabiner.
You must realize that varmints are very adept diggers. The chicken run should be secured on all sides with hail screen. I prefer hail screen over chicken wire because it is more secure. I have heard of coons tearing through chicken wiring. Remember in particular that the chicken run should have hail screen on the bottom. Varmints can easily dig under the chicken run fence. Protect your birds by covering the bottom of the run with hail screen.
Instinctively, chickens know to go into their coops at dusk. What is critical is for you to close them up as soon as they go in. Varmints come out at dark fall. You have a small window to close the chickens before the varmints will be coming out. Many times when disaster hits it is because the owner was distracted and did not get the chicken coop closed on time. Being diligent to close the chickens before it gets dark, and to let them out after it is light, and to make sure the coop is completely secure will go a long way in protecting your chickens in most circumstance.
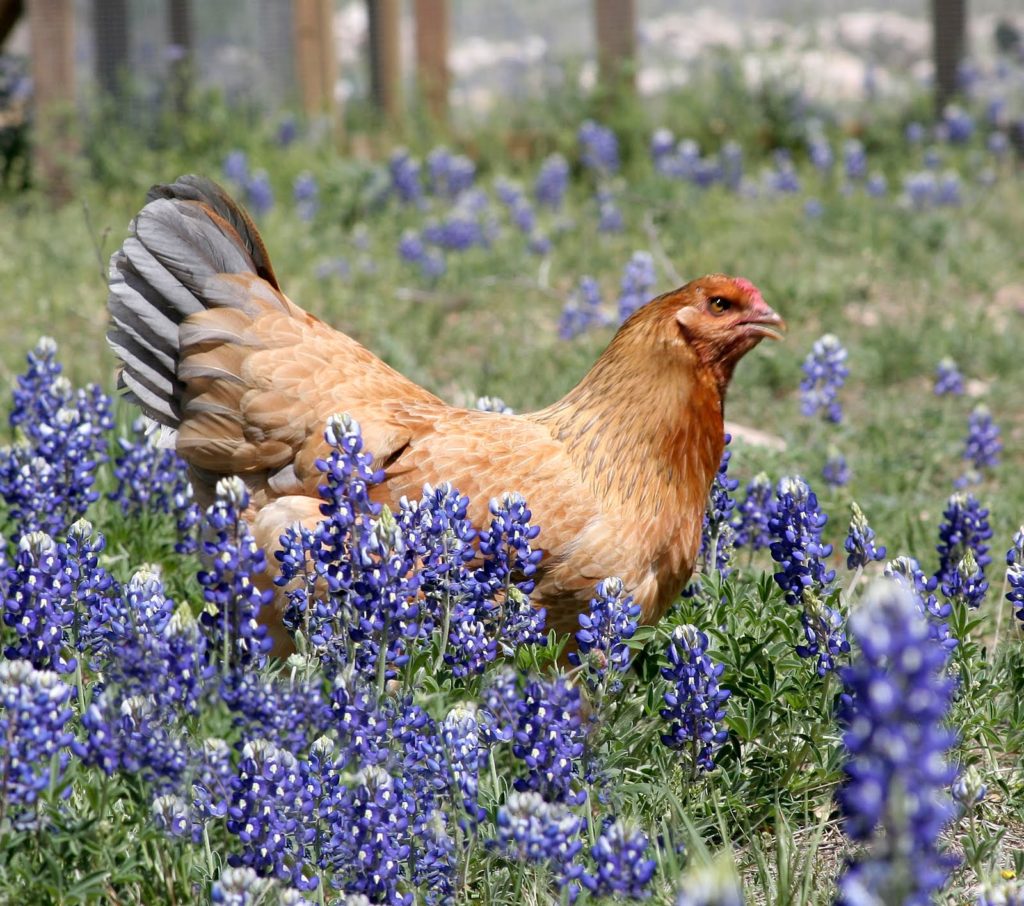
One of our favorite chickens in our little barnyard
I hope you have found this article useful. Again, this strategy is a layered strategy, and do not be discouraged if you can not do all the things I have shown. If nothing else, if you can have a secure coop and be diligent to close it as soon as the chickens are in, you will be in pretty good shape.
The video above summarizes our experience with McMurray Hatchery. We have been ordering and raising these chickens for the last ten years. The video above gives the complete story on these chickens. The bottom line is we have ordered three sets of these chickens over the last ten years. The first batch laid beautiful multi-colored eggs. The second batch, ordered 4 years ago produced eggs with no color at all. Then, the third batch that we just recently ordered similarly laid eggs with no color. So, in the last five years, we ordered two batches of 7 chickens each, and have gotten no colored eggs. Hence, I can not recommend these chickens. They used to be great chickens, but something has changed. I would love to hear your experience in the comments below. Similarly, I would love to hear from McMurray Hatchery.
In the video above we share details of our experience purchasing baby chicks from Greenfire Farms. We purchased 20 American Bresse day old chicks. This is a rare and exotic breed of meat chicken, and the cost was $20 per chick. We have raised chickens on the homestead for the last 10 years, but this is our first try at raising meat chickens.
First off, when the chicks arrived, one was dead. Greenfire Farms requires you send a picture of the dead chicken to get a refund. This was all very upsetting to my wife, and it was very traumatic to her that the had to go get the chick out of the trash, and take a picture of it. I would suggest that Greenfire Farms should have a higher level of trust for their customers. My experience is that homesteaders are pretty honest people, and I wish Greenfire Farms would rethink this policy.
What we like about the Bresse chickens is that they are an heirloom breed. Most meat chickens these days, especially the cornish cross chickens, are overbred and have become bloated franken-chickens. These freaks of nature are so big they can barely walk, have deformed features and have to be butchered at around 10 weeks because they can not live as a normal chicken would. We did not want these overbred freaks on our homestead.
The nice thing about the Bresse is that they are beautiful, well formed and proportional birds. We found the chicks to be very calm, and the Bresse chickens have peaceful temperaments and are nice to have in the barnyard. I will also add that the roosters have a nice disposition. They get their rooster job done, but they are not mean to the hens and are not aggressive to us.
We have butchered our first batch of Bresse Chickens. When the roosters got to be about 2 1/2 months old we butchered them, saving back the best two roosters to allow us to raise more chicks. Bresse are known for “firm” meat. We found the meat to be indeed firm . . . and in fact borderline tough. The meat was tasty.
Our plan for our bresse chickens is to try to raise more. We presently have 10 hens and two roosters. Our hope is to have chicks. When we have chicks, we will keep the hens, and then eat most of the roosters.
The Bresse are good egg producers, so the breed is an excellent dual purpose breed.
There were several areas of concern we have over these birds. In addition to the one bird that was dead on arrival, we found after a week or so two of the chickens were not able to walk. They just flopped around. Upon closer inspection, we found that these chicks had no hip joint. There leg bones were not connected to their bodies. It appeared to be a congenital defect. Upon further investigation, we found that at least 1/3 of the chicks had some sort of deformity in their legs and feet. Many had toes that were upside down or sideways. Many of the chickens walked awkwardly due to these leg/feet deformities. We wonder if these chickens have become overbred, and perhaps too small of a breeding flock was brought to the US to propagate this breed.
Overall, we are pleased with the chickens and plan to continue to raise them.
I have tried just about every method of composting you can imagine. As you all know, you can never have enough compost, so I am always looking for ways to make better compost quicker. I have always been frustrated with how slow and labor intensive the outdoor methods are, and find I am getting a product that often times has a lot of incompletely composted material. In the end, what I have found to be the best way to quickly make the best compost is to use earthworms. The compost from earthworms is called Vermicompost, and is also sometimes known as Worm Castings. Whatever you call it, it is basically worm poop which the worms create as they are eating table scraps or other organic matter. To the organic gardener, vermicompost is pure black gold for the garden.
So, I believe the best way to compost is to use earthworms. Now the question becomes what is the best way to start your earthworm operation. There are a lot of videos out there on how to grow worms in home brew systems. The advantage of this is it offers the lowest cost approach as you utilize scrap material you probably have laying around like 5 gallon buckets. For me though, when I am learning something new, I really want to achieve early success, and want to go with a proven, turnkey system. Once I develop success and expertise, and want to expand the operation, I can always go back and then consider the homebrew approaches. But, to guarantee early success, I typically start with a commercial turnkey system.
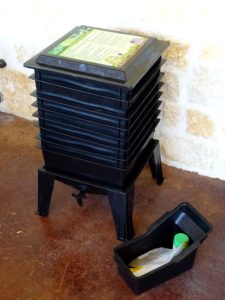
This is a picture of my Worm Factory 360
I did a lot of research on growing worms, and in the end decided to go with the Nature’s Footprint Worm Factory 360. Knowing that I wanted to make a lot of compost quickly, I also ordered the extra set of trays, found HERE. This allowed me get my compost operation going even quicker. What I liked about this system is that it appeared to have all the bugs worked out, and it included EVERYTHING you needed to get started, including the initial worm bedding and bedding amendments. (The system I ordered did not include the worms, and I ordered them separately from Amazon HERE)
In choosing the Worm Factory 360, I have not been disappointed. My worms got off to a strong start, and my first tray of compost was ready in about a month. The system works as advertised, and all the details have been worked out, so that it is about as close to fool proof as you can get.
Setting your system up is a breeze. When you unbox it, it is obvious how to put it together. There is a bottom stand, a series of trays and a top. To set it up, you put a couple sheets of newspapers in the bottom tray. These newspapers discourage the worms from crawling down into the base unit. You only do the bottom newspapers on the first tray. On the next trays you want the worms to crawl up into the tray, so you don’t put the newspaper barrier.
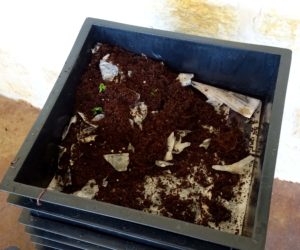
First tray has bedding, and is now ready for the worms
You then break off about 1/2 of the brick of coir that is provided with the worm factory. Slowly add water until the coir is fully expanded, but do not saturate it. When you grab a handful and squeeze it should be soft, moist and spongy, but you should not be squeezing water out. If you are squeezing water out, you have too much moisture. Not a big deal, just add a little more coir if this happens. In the end, the coir should be fully moist, fully expanded and not saturated with water.
Add the coir to the bottom tray on top of the newspaper. Then add a handful of shredded newspaper. This mixture of coir and shredded newspaper is the bedding for the worms. It is a place they will be comfortable, and will recognize it as their new home.
There are a couple more components to add before putting the worms in. First, realize that worms are like chickens . . . they have no teeth. They will need some small rocks, or grit, to eat, in order to chew their food. Luckily Nature’s footprint has included some pumice in the Worm Factory kit. Add a handful of the pumice to the tray so the worms will have some grit to munch on. You will want to get more pumice, as the kit has just enough for the first few trays. Always try to buy local, but my big box stores do not have pumice. The best deal I have found on it is at amazon. The deal I found is HERE. Note that is a BIG bag of pumice and should last you years.
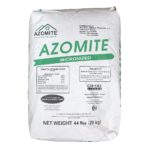
Azomite is cheaper in big bags
The next amendment that needs to be added to the worm bedding is some sort of mineral dust. The Worm Factory 360 includes a small bottle of rock dust, which will get you started. Add a tablespoon or two to the bedding when you start each tray. Again, I want to find a deal on the rock dust for future trays, and I like buying in bulk to same money. Try to find Azomite locally, and I suggest getting a 44 pound bag, as it is very useful in the garden, and not just in your worm bin. If you can not find it locally, the best deal I have found is HERE.
Now you are almost ready to add the worms. What I like to do before adding the worms, is to spray some quality Compost Tea on the bedding. One of the keys to organic gardening is to have a soil teaming with micro organisms. I like to jump start this process by spraying the bedding with Boggie Brew Compost Tea. Boogie Brew is teaming with beneficial micro organisms, and by spraying the bed before adding the worms, you get the process started. In addition, I use Boogie Brew all over the garden, and in the greenhouse. I have found that it greatly improves the performance of my hydroponic vegetables when used as a foliar spray. You can get the Boogie Brew mix HERE. This six pounds of mix will make a HUGE amount of boogie brew, and the bag lasts a long time.
Now you are ready to add the worms. I suggest adding at least 1000 worms to get your system kick started quickly. I have had good luck with both Red Wigglers and African Night Crawlers. You can usually find local suppliers of worms, but if you can not, I have found THESE to work well.
OK, now that you have your system set up, and your worms added, now comes the maintenance phase. You will want to feed the worms every day, or every few days. It is not hard, but you do need to watch and not over feed or underfeed. You want to start out slowly, as they seem to not eat much at first, as they get acclimated to their new home. Add just a little bit every day. Maybe a lettuce leaf, or few slices of cucumber. It is important to not over feed them, especially at first. You want them to eat the food, you do not want the food to sit and rot. If you put too much food, and it rots, then you risk attracting fruit flies, or gnats, neither of which is a good thing. So, watch the amount of food being eaten, and add more as they are able to process more. When they get acclimated, and get going, you can add a small bowl of food every day or every few days.
A couple of very important things. Earthworms are happy in a relatively small temperature range. Here in West Texas, it is too hot in the summer and too cold in the winter for the worms to thrive outdoors. Here at my house, even the garage would be to hot in the summer. So, for best results, I have found you need a place indoors for the worms. They seem to really like temperatures between 50 and 80 degrees F. I have put mine on the sun porch, which is fully enclosed. The good news is that if you are careful to not overfeed them, there is no odor at all coming from the worms. In fact, if you open the bins, it really has a very pleasant, rich, “earthy” smell.
Also, pay attention to what they like to eat and not like to eat. I have found that mine will eat almost any vegetable type kitchen scrap. I have found that they do not eat cabbage, unless there is absolutely nothing else to eat. Also, you do not want to add meat, as that could introduce pathogens into your compost. I have also found that they do not like citrus.
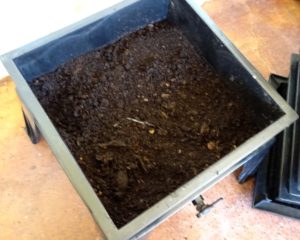
A tray of finished vermicompost from the Worm Factory 360
OK, so maintain proper temperature and keep feeding them. As you feed them, you will eventually get to the point that your first tray is almost full. At this point, add a second tray, following the same procedure you did above on the first tray. This time, though, do not put the sheet of newspaper in the bottom of the tray. You want the worms to crawl up into the upper tray, so do not block them with the newspaper. Once you add the next tray, stop feeding the bottom tray and start feeding the new tray. Feed the new tray slowly, as it will take time for the worms to move up to the new level. They will spend some time finishing up the processing of the lower level, and all the worms will not move up until everything has been eaten in the lower tray. Every few days, you can peak into the lower tray, and one day you will find all the worms have abandoned this level, and that is your indication that you can remove the tray and use that beautiful vermicompost you have just created.
On other note on using the Worm Factory. I have free range, grass fed dorper sheep. They produce a LOT of very nice organic sheep poop, and I want to compost that to use in the garden. When I just add sheep poop to a tray with vegetable scraps, they do not want to eat the poop. Hence, to solve this problem, I have two systems. One system I have African Nightcrawlers, and I feed that system only sheep poop. Since they have no choice, they eat the poop, and eventually get used to it and really go after it. The other system has Red Wigglers, and that system I feed with kitchen scraps and vegetable scraps from the greenhouse. I did not have as much luck adding poop and food to the same system.
I hope you have found this tutorial useful, and feel free to comment or ask questions below. Compost On!
One of the challenges for the homesteader with a small flock of sheep or goats is how to get the animals to market or to the butcher. The challenge is that it is not worth purchasing a stock trailer to transport just a few sheep or goats a year.
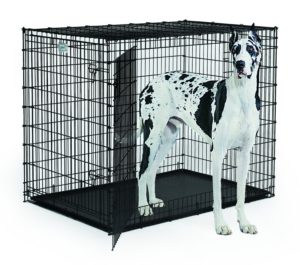
This huge Midwest Solutions Dog Crate can be used in the back of your pickup to transport sheep or goats to market
You can borrow one from a friend but the day will come when they get tired of you borrowing their trailer. What I have found is that a great solution is to purchase a large dog cage for the back of your pickup (Get the one I bought HERE). The cage fits in the back of a small pickup, has room for two to three lambs, and is sturdy enough to contain the animals.
I have found that for lambs up to 100 pounds, I can load them into the cage by myself.
I have been growing chickens on the homestead for about 10 years now. I grow chickens for eggs, not meat. Hence, my main concern is chickens that will be great producers of big beautiful brown eggs. I have tried lots of different breeds, but for my money nothing can come close to the Red Star line from McMurray Hatchery (I am not affiliated with McMurray Hatchery in any way, and do not receive any type of incentive from them).
OK, here is the rundown on the Red Stars. They are prolific egg producers. Not only to they produce large quantities of eggs, they produce very large eggs . . . big brown beautiful eggs. So, for my primary priority, these chickens just cannot be beat. The second thing that I really like about these birds is that they are a very calm and social breed of chickens. When I go out, they run up like pets. They like to be petted, and like to sit and talk to me. Each breed of chickens has its own unique temperament . . . some breeds are very nervous and jumpy, and some are aggressive. The Red Stars are calm and friendly, and they really make the homestead a peaceful place. I really love going out in the mornings and evenings to spend a little time with them. Taking care of the chickens is an enjoyable event, and one I look forward to.
The next factor I really appreciate about the Red Stars is that they are very aggressive foragers. When I let them out in the morning, they do not head for the feed bucket, they head for the pasture. All day they are out scratching and pecking, and are very adept at hunting down and eating all manner of bugs. This robust foraging characteristic means I save on the feed bill. I do put out some supplemental feed for them, but most of what they eat is what the go find during the day.
I also find these birds to be extremely healthy animals. When I get a new batch of Red Stars, I find the mortality is around 5%. Most of the time I do not lose over one bird in an order of 20. The chicks come alive and perky, and right out of the box, when they are a day old, they are already scratching and pecking and looking for food. In addition, I have never had an issue with congenital defects. The birds grow up well formed, and do not have the leg and feet issues I have found in some other breeds. I also think they stay healthier throughout their lives . . . I think all that exercise as they are out foraging on pasture helps keep them healthy.
I have found that the chickens produce very well for the first two years, and then egg production begins to taper off. On our homestead we have a generous retirement plan for the chickens. We do not put the chickens in the pot after two years. If they work hard and produce well for two years, we let them hang around in retirement even if they are not producing as many eggs. We have several chickens that are nine years old. They do not produce many eggs, but we still enjoy having them around.
The one downside to the Red Star chickens is that they are not a purebred chicken . . . they are a proprietary cross between one type of rooster and another type of hen. Hence, if you have Red Stars, and allow them to raise baby chickens, the baby chickens will not be Red Stars, and will not have the same advantages. Hence, if you want Red Stars you have to order them, you can not propagate your flock yourself. This is not a big deal, and we typically just order a new batch of 20 or so every other year.
Bottom line, if you are new in raising chickens, and want a breed that is calm, friendly and produces loads of wonderful eggs, the Red Star is the breed for you.